Diagnosing and Preventing Dropper Bottle Failures
The Diagnosis: Why Your Dropper Bottle Is Failing
A dropper is a system of four components: the Bulb (squeezable part), the Cap, the Pipette (glass tube), and the Bottle Neck. For it to work, the system must be perfectly sealed and compatible with your formula.
1. Improper Seal & Air Leakage (The Most Common Culprit)
Air is getting into the system somewhere other than the pipette tip, which breaks the vacuum. This can happen in three places:
Bulb-to-Cap Seal: The seal between the rubber/silicone bulb and the cap it's fitted into is the most common failure point. If it's loose, improperly seated, or made of a material that has hardened, air will be sucked in from around the bulb instead of liquid being drawn up the pipette.
Cap-to-Bottle Seal: If the threads on the cap and the bottle neck (the GPI finish) are mismatched or have manufacturing flaws, the cap won't create an airtight seal when tightened. This often leads to the formula "leaking out" from the threads.
Pipette-to-Cap Seal: Where the glass pipette is secured inside the cap, there can be micro-gaps that allow air to leak, especially with low-viscosity (very thin) liquids.
2. Formula Incompatibility & Viscosity Mismatch
The dropper system must be matched to your specific product formula.
High Viscosity: If your formula is a very thick serum or oil, a standard dropper may not have enough suction power to lift the heavy liquid effectively. The liquid will be slow to draw and may not fill the pipette completely, leading to inaccurate doses.
Chemical Incompatibility: Certain essential oils, solvents, or aggressive active ingredients can cause the bulb material (especially natural rubber or lower-grade nitrile) to swell, harden, or become gummy over time. This degradation destroys the bulb's elasticity and sealing ability.
3. Component Quality & Manufacturing Tolerances
Inconsistent manufacturing can lead to faulty components that are not discovered until they are in the consumer's hands.
Bulb Material: A low-quality rubber bulb may lose its elasticity quickly, resulting in permanently weak suction.
Pipette Tip: The opening at the end of the glass pipette might be too large, making it difficult to hold low-viscosity liquids, or too small, making it impossible to draw up high-viscosity serums.
Micro-Fractures: Hairline cracks in the glass pipette, often invisible to the naked eye, will completely prevent a vacuum from forming.

The Solution: How to Avoid and Prevent These Failures
Preventing dropper failure requires a proactive approach during the sourcing and testing phases. Here is the quality assurance checklist your brand should implement.
1. Compatibility Testing is Non-Negotiable
This is the single most important step. Before placing a bulk order, you must test your final product formula with the exact dropper assembly from your supplier for an extended period (e.g., 4-12 weeks) at various temperatures. This will reveal any long-term chemical incompatibilities, material degradation, or sealing issues.
2. Specify Every Component of the System
Do not just order a generic "dropper bottle." Specify the technical details to ensure quality and consistency:
Bulb Material: Choose the right material for your formula. Silicone is often a better choice than rubber for compatibility with a wider range of ingredients. For oily formulas, Nitrile rubber is excellent.
Bulb Capacity & Durometer: Specify the suction capacity (e.g., 0.8ml, 1.0ml) and the hardness (durometer) of the bulb to ensure it's powerful enough for your formula's viscosity.
Pipette Specifications: Define the pipette's length, diameter, and the shape of the tip (e.g., straight tip, tapered tip). For precise dosing, request pipettes with calibration marks printed on the glass.
3. Vet Your Supplier and Request QC Documentation
A reputable supplier should be able to provide you with quality assurance data.
Ask for Technical Drawings: These drawings show the precise dimensions and tolerances for each component, ensuring the parts are designed to fit together perfectly.
Request Vacuum Leak Test Results: Many high-quality manufacturers perform vacuum leak testing on their dropper assemblies to guarantee they can hold a vacuum. Ask for this data.
4. Standardize Your Production Line's Assembly Process
Ensure that during the filling and capping process, the dropper caps are being applied with a consistent, measured force (torque).
Over-tightening can damage the cap threads and cause leaks.
Under-tightening will fail to create an airtight seal.
Automated capping machines with precise torque settings are the best way to ensure a perfect seal on every single bottle.
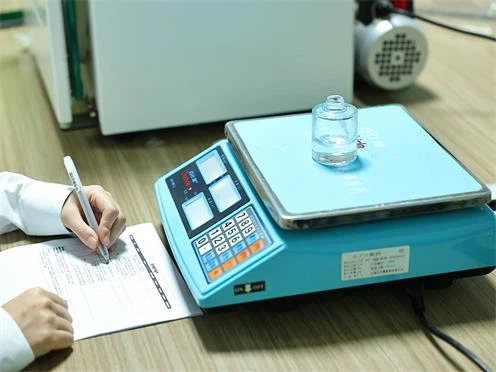

part2---Measure bottle volume

part3---Block test

part4---Adhesion test

part5---Spray adhesion test

part6---Check bottle tightness
Industry Guide: How to Select a High-Performance Dropper Bottle
Choosing a dropper bottle is not about selecting individual parts; it's about specifying a complete, high-performance dispensing system where every component works in perfect harmony with your formula and your brand. A "good" dropper bottle is one that is reliable, accurate, and enhances the perceived value of your product.
Follow these four critical selection criteria to ensure you choose the right system.
Criterion 1: The Formula is Your Guide
Before you look at a single bottle, you must analyze your product formula. The liquid inside dictates every choice you make.
Viscosity (Thickness):
For Low-Viscosity (Thin) Liquids (e.g., watery essences, toners): You need a dropper with a standard or slightly smaller pipette opening (orifice) to prevent the product from dripping out too easily. The suction required is low.
For High-Viscosity (Thick) Liquids (e.g., gel-serums, heavy oils): You require a dropper system with more power. This means a higher-capacity bulb (e.g., 1.0ml vs 0.8ml) that creates stronger suction and a wider pipette opening to allow the thick liquid to be drawn up easily without clogging.
Formula Sensitivity:
Light-Sensitive Formulas (with Retinol, Vitamin C, etc.): You must choose a bottle that offers UV protection. The best options are amber glass, cobalt blue glass, or opaque-coated glass (e.g., sprayed black or white). Clear glass is only suitable for formulas that are not light-sensitive.
Chemically-Reactive Formulas (with essential oils, solvents): This requires careful material selection for the bulb. See the component breakdown below.
Criterion 2: The Anatomy of a High-Quality Dropper System
Break down the dropper into its core components and know what to ask your supplier for.
| Component | What to Look For | Why It's Important |
| The Bulb |
Material: Specify Silicone, Nitrile Rubber, or Natural Rubber. Durometer (Hardness): A specific hardness ensures a consistent feel and rebound. Capacity: Request a specific suction capacity (e.g., 0.8ml, 1.0ml). |
Silicone offers the best purity and chemical compatibility for luxury skincare. Nitrile is the workhorse for oil-based formulas. The capacity and hardness must be matched to your product's viscosity for effective suction. |
| The Pipette |
Material: Glass (standard for inertness) or Plastic (for durability). Tip Shape: Tapered (for control) or Straight. Calibration Marks: Printed measurement lines (e.g., 0.25, 0.5, 0.75 ml). |
Calibration marks are the single best feature for ensuring dosing accuracy. This directly addresses the problem of inconsistent amounts and is a huge value-add for the consumer, justifying a premium price. |
| The Cap / Collar |
Material: PP (Polypropylene), or Aluminum over PP for a luxe feel. Liner: Ensure it has a high-quality inner liner (e.g., PE or TPE liner). GPI Finish (Threads): The thread size (e.g., 20/400) must be an exact match for the bottle neck. |
The liner is the key to creating an airtight seal. The GPI finish must be a perfect match between the bottle and cap to prevent leaks at the threads, which is a major source of product failure and customer complaints. |
Criterion 3: The User Experience & Brand Perception
A good dropper doesn't just work; it feels right and looks great.
Dosing Accuracy: Does the system dispense a consistent, predictable amount every time? This is the most crucial part of the user experience. Demand calibration marks and a well-matched system.
Aesthetics & Feel: The weight of the glass, the finish of the collar (e.g., matte, metallic), and the color of the bulb are all branding decisions. A custom-colored bulb or a hot-stamped collar can elevate a standard bottle into a signature piece of packaging.
Child-Resistance (CR): For certain products, especially those containing CBD or specific active ingredients, a child-resistant (e.g., push-and-turn) dropper is a legal and safety requirement. Ensure the mechanism is intuitive for adults while remaining compliant.
The Final, Non-Negotiable Step: Rigorous Testing
The Golden Rule: Always test your final product formula with the exact packaging you intend to order.
Request Samples: Get at least 10-20 sample units from your potential supplier.
Conduct Compatibility Testing: Fill the samples with your product and store them for several weeks, exposing them to different conditions (heat, cold, light). Check for any degradation of the bulb, cap, or product itself.
Perform Functionality Testing: Use the samples yourself. Does the dropper draw a full dose? Does it leak from the cap or the bulb when stored on its side? Is the dosage consistent?
Execute a Shipping Test: Ship the filled samples to another location and back to simulate real-world transit and see if any leakage occurs.